I’ve had a few people at the trailhead comment on the trailer lights I put on my hitch mounted rack so I thought I’d do up a quick post about the parts/process.
While writing this post I had the idea that using an LED light strip (like the kind they put below the tailgate on a truck), might be a cheaper and easier solution. Which it turns out it is. I can’t vouch for this type of install, but I have used similar lights on my motorcycle with no issues. So maybe save some time and money & have a look @ these:
60 Inch Tailgate LED Light Bar
Parts
- A pair of trailer lights. I use this set due to the low profile.
- Trailer wiring & connector
- Waterproof butt crimp connectors
- Right angle brackets
- Bolts & Nuts (for connecting light bars to brackets)
- Self tapping metal screws (for connecting brackets to rack)
- Shrink wrap tubing
- Corragated plastic wire wrap (to make it all look pretty)
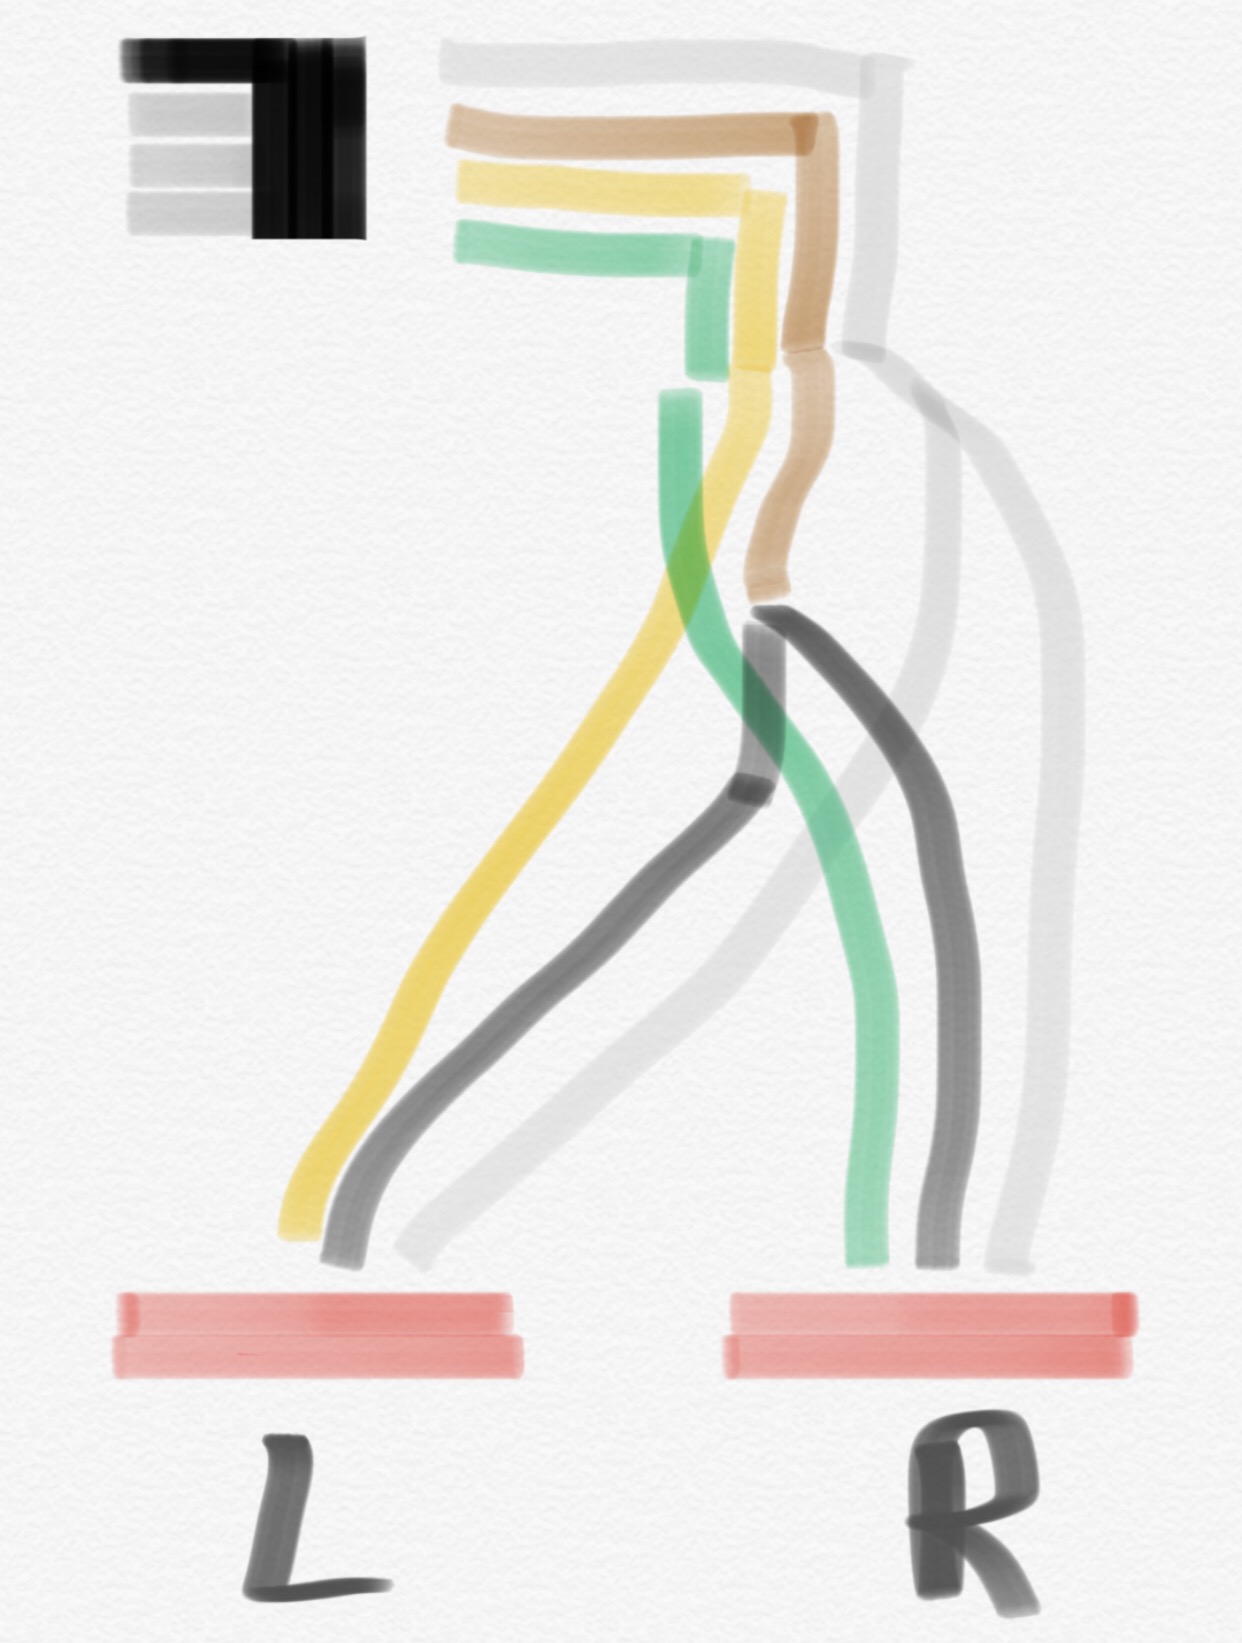
Wiring Diagram
The first step is to wire the lights up temporarily to make sure all the connections are correct.
There is a good wiring info table on eTrailer: eTrailer Wiring FAQ this is where I found the info for the below.
There are 5 wires coming off the wiring harness:
- White - ground to rack
- Brown/Green - Tail/marker
- Brown - Tail/marker
- Yellow - Left Turn
- Green - Right Turn
Each light has 3 Wires:
- White - ground to rack
- Green - Turn
- Black - Tail/marker
The wiring is easy just follow the below diagram, and connect the wires as:
- All the whites together & bolt these directly to the bike rack for a ground.
- Connect the Brown/Green to the black wire on one of the lights.
- Connect the brown to the black wire on the other light.
- Connect the green wire to the green wire on the RIGHT light.
- Connect the yellow wire to the green wire on the LEFT light.